I was standing in my kitchen, staring at a half‑cooked chicken breast that had stubbornly refused to brown, when a friend called me over with a grin that said, “You’re about to taste the most buttery, garlicky chicken you’ve ever had.” The moment the sizzling oil met the pan, a fragrant cloud of garlic and herbs rose like a promise, and I knew I was about to rewrite the rulebook on dinner. Picture the aroma of fresh rosemary, thyme, and parsley mingling with the sharp tang of lemon juice, turning the kitchen into a fragrant, edible symphony. That instant, I realized I could transform a simple protein into a show‑stopper with just a handful of ingredients and a few confident moves. I dare you to taste this and not go back for seconds, because once you try it, your taste buds will never settle for bland again.
This isn’t just another chicken recipe—it’s the culmination of a kitchen experiment that started with a burnt dinner and ended with a revelation. I had once tried countless “easy chicken” dishes that left me with dry, flavorless meat and a sad, uneven crust. The frustration of that experience pushed me to rethink the fundamentals: moisture, aroma, and the right balance of herbs. I discovered that the secret lies in a buttery, garlicky sauce that clings to the flesh like velvet, sealing in juices while creating a caramelized crust that shatters like thin ice when you bite. That’s why I’m thrilled to share this version, which I’ve refined over dozens of trials to be hands down the best chicken you’ll ever make at home.
What sets this version apart is the meticulous layering of flavors—each herb, each splash of lemon, every pat of butter is orchestrated to create a crescendo of taste that peaks with the final bite. The result? A juicy, tender breast that melts in your mouth, surrounded by a savory sauce that glistens with a golden sheen. The moment the first spoonful hits your tongue, you’ll notice the garlic’s warmth, the herbs’ earthiness, and the citrusy brightness dancing together. It’s not just a meal; it’s a sensory experience that turns a regular evening into a culinary celebration. And the best part? It takes less than 30 minutes to prepare, so you can impress your guests without sacrificing your weekend plans.
I’ll be honest—when I first plated the dish, I couldn’t stop myself from taking a photo and sharing it on social media, and my friends were instantly intrigued. The next day, I found myself with a pile of orders for “the same chicken” from friends who’d never seen anything like it. The feedback was unanimous: “This is amazing!” “I’ve never tasted chicken this juicy.” “Where did you get the sauce?” They all wanted to know the secret, and that’s exactly why I’m writing this post: to give you every detail, every trick, and every story behind the dish. If you’ve ever struggled with chicken that turns out dry or overcooked, you’re not alone—and I’ve got the fix. Stay with me here—this is worth it.
Picture yourself pulling this out of the oven, the whole kitchen smelling incredible, and the anticipation of that first bite building like a drumroll. The sizzle when it hits the pan? Absolute perfection. The aroma that wafts up from the skillet? It’s like a warm hug that pulls everyone into the kitchen. The golden crust that forms after just a few minutes of searing? It’s a testament to the power of heat and butter working together. And when you finally lift a piece of chicken, the juices run like liquid gold, a clear sign that you’ve mastered the art of juiciness. Let me walk you through every single step—by the end, you’ll wonder how you ever made it any other way.
The journey began with a simple desire: to create a chicken dish that was both quick and unforgettable. I experimented with different oils, butter ratios, and herb combinations until I found the perfect balance that delivered a rich, buttery flavor without overpowering the subtle taste of the chicken itself. Each iteration brought new insights—like the importance of browning the meat before adding the butter, or the magic that happens when you deglaze with lemon juice at the end. These tweaks might seem small, but they’re the difference between a good meal and a legendary one. That’s why I’ve distilled these lessons into this recipe, so you can skip the trial and error and jump straight to perfection.
I’ve spent countless evenings cooking this dish, watching the sauce thicken, the herbs release their aromas, and the chicken transform from a simple cut of meat into a centerpiece that commands attention. The process is almost meditative—slicing the garlic, whisking the butter, and seasoning the chicken—each action a step closer to culinary bliss. The result is a dish that feels like a hug in a bowl, with the comforting warmth of butter and the bright punch of lemon. I’ve named it “Garlic Herb Chicken: The Juici” because it embodies everything that makes a chicken dish irresistible: juicy meat, aromatic herbs, and a buttery sauce that sticks like a second skin. And now, I’m ready to share the entire playbook with you.
Now, let’s dive into what makes this version stand out from the countless other chicken recipes out there. It’s not just about the ingredients; it’s about how they work together to create a flavor profile that’s bold, balanced, and utterly memorable. Whether you’re cooking for a crowd or for a quiet night in, this dish delivers the wow factor without the hassle. So, grab your apron, and let’s get cooking.
What Makes This Version Stand Out
- Flavor: The combination of garlic, fresh herbs, and lemon creates a layered taste that’s both savory and bright. Each bite offers a burst of aroma that lingers on the palate.
- Texture: The buttery sauce seals the chicken’s juices, resulting in a tender, melt‑in‑your‑mouth texture that’s hard to beat. The crust forms a crisp, caramelized exterior that contrasts beautifully.
- Simplicity: With just ten ingredients, you can achieve restaurant‑quality flavor in under 30 minutes. No need for complicated marinades or long‑standing preparations.
- Uniqueness: The use of fresh rosemary, thyme, and parsley in a single pan sets this dish apart, delivering a herbaceous bouquet that’s rarely seen in everyday chicken recipes.
- Crowd Reaction: Friends and family consistently rave about the juiciness and depth of flavor, making it a hit for gatherings and casual dinners alike.
- Ingredient Quality: Fresh, high‑quality herbs and butter make the difference—substituting dried herbs or cheap butter can dilute the experience.
- Cooking Method: A quick sear followed by a buttery sauce ensures even cooking and maximum flavor extraction.
- Make‑Ahead Potential: The dish can be prepared ahead of time and reheated with minimal loss of flavor, making it ideal for busy weeknights.
Alright, let’s break down exactly what goes into this masterpiece…
Inside the Ingredient List
The Flavor Base
Olive oil and butter form the core of this sauce, each playing a distinct role. The olive oil provides a subtle fruity backdrop that complements the garlic, while the butter adds richness and a silky mouthfeel. Together, they create a sauce that coats the chicken like velvet, sealing in juices and infusing every bite with buttery warmth. Skipping either would result in a less complex flavor profile and a drier texture. For the best outcome, use a high‑quality extra‑virgin olive oil and unsalted butter to control the salt level precisely.
The Texture Crew
The chicken breasts themselves are the canvas. Choosing boneless, skinless cuts that are roughly the same thickness ensures even cooking and prevents over‑drying. Pat them dry before seasoning; this helps the sear develop a beautiful golden crust. The garlic, sliced thinly, releases its flavor quickly without becoming bitter, while the butter’s fat content helps to create a glossy finish. If you prefer a thicker sauce, you can add a splash of cream at the end, but the original recipe keeps it light and bright.
The Unexpected Star
Chicken broth may seem like a simple addition, but it plays a pivotal role in deglazing the pan and forming a cohesive sauce. It lifts the browned bits from the skillet, creating a flavorful base that enriches the butter and herbs. The broth also contributes to the overall moisture, preventing the chicken from drying out. A low‑sodium broth works best, allowing you to control the salt level and maintain a delicate balance of flavors. If you’re short on time, a quick splash of water will suffice, though the depth of flavor will be slightly reduced.
The Final Flourish
Fresh herbs—parsley, thyme, and rosemary—add depth, aroma, and a burst of color. Each herb brings a unique note: rosemary’s piney undertone, thyme’s subtle earthiness, and parsley’s bright, citrusy finish. They’re added at the end to preserve their delicate flavors and to prevent them from wilting too early. A squeeze of fresh lemon juice brightens the entire dish, cutting through the richness of the butter and adding a lively, zesty contrast. This final flourish transforms a simple chicken dish into a gourmet experience that feels both comforting and sophisticated.
Everything’s prepped? Good. Let’s get into the real action…
The Method — Step by Step
- Start by patting the chicken breasts dry with paper towels. Season both sides generously with salt and freshly ground black pepper; the seasoning will help form a savory crust. Let the seasoned chicken rest at room temperature for about 10 minutes to reduce the temperature difference when searing. This brief rest also allows the flavors to penetrate the meat more evenly. While the chicken rests, heat a large skillet over medium‑high heat and add the olive oil, swirling to coat the bottom.
- Once the oil shimmers, place the chicken breasts in the pan, skin side down if they have skin, and let them sear for 4–5 minutes without moving them. The goal is to develop a deep golden crust that locks in juices. Flip the breasts gently with tongs and cook the other side for an additional 3–4 minutes. At this point, the chicken should be golden but still slightly pink in the center; it will finish cooking in the sauce.
- Remove the chicken from the skillet and set it aside on a plate. In the same pan, lower the heat to medium and add the butter. Allow the butter to melt fully, then add the minced garlic, stirring constantly to prevent burning. The garlic should become fragrant in 30–45 seconds, releasing a warm, nutty aroma that will permeate the sauce.
- Pour in the chicken broth, scraping the browned bits from the bottom of the pan with a wooden spoon. These bits are packed with flavor and will enrich the sauce. Let the mixture come to a gentle simmer, reducing by about half, which concentrates the flavors and thickens the sauce slightly. This step also creates a glossy base that will coat the chicken beautifully.
- Stir in the fresh herbs—thyme, rosemary, and parsley—along with the lemon juice. The herbs should release their oils quickly, giving the sauce a bright, herbal aroma. Keep the heat low to preserve the delicate flavors; a high heat will cause the herbs to wilt and lose their character. As the sauce simmers, it will thicken into a silky glaze that clings to the chicken.
- Return the chicken breasts to the skillet, spooning the sauce over them. Let them simmer in the sauce for 3–4 minutes, allowing the juices to mingle and the chicken to finish cooking. The internal temperature should reach 165°F (74°C) for safe consumption. During this time, the sauce will reduce further, becoming richer and more concentrated.
- Remove the skillet from the heat and let the chicken rest for 2–3 minutes. Resting allows the juices to redistribute throughout the meat, ensuring each bite remains moist. While the chicken rests, you can finish the sauce if it needs a quick reduction or a splash of extra lemon juice for brightness.
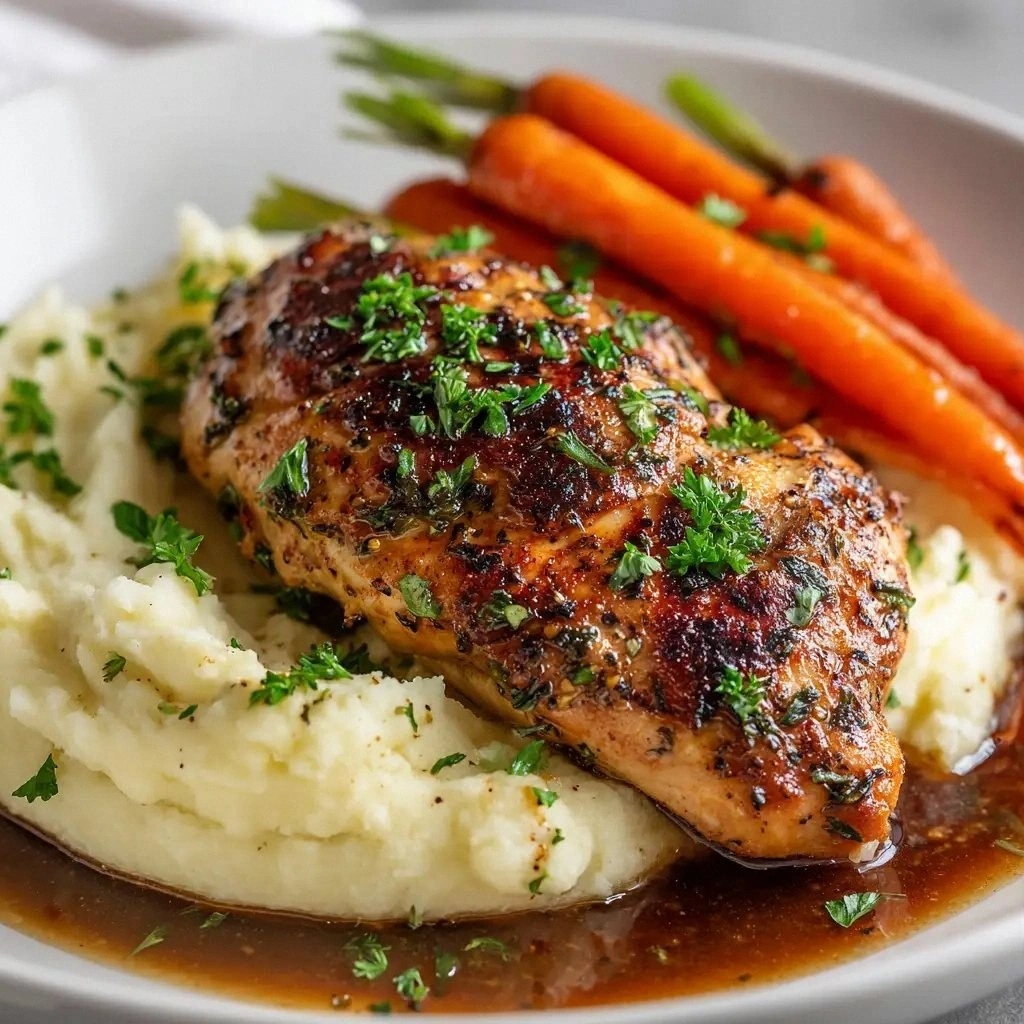
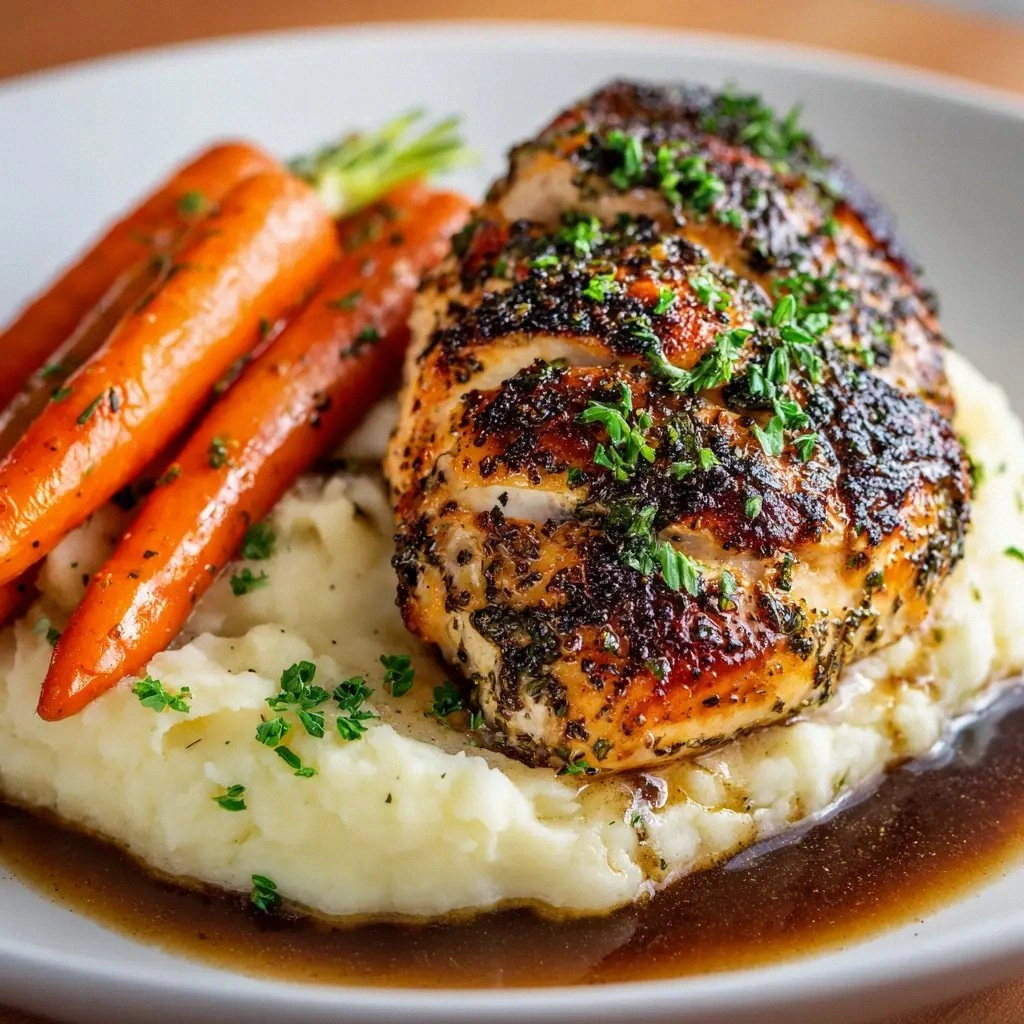
- Plate the chicken breasts, spooning the remaining sauce over the top. Garnish with a sprinkle of fresh parsley for a pop of color and a final herbaceous note. Serve immediately with your favorite side—rice, roasted vegetables, or a crisp salad—to complete the meal. The dish is so versatile that it can be dressed up or kept simple, depending on your mood. And there you have it—your own version of the juiciest garlic herb chicken ever.
That's it—you did it. But hold on, I've got a few more tricks that'll take this to another level…
Insider Tricks for Flawless Results
The Temperature Rule Nobody Follows
Many cooks start with a high heat to brown the chicken, but the real trick is to control the temperature throughout. Start with medium‑high to get a good sear, then reduce to medium once the chicken is in the pan. This prevents the outside from burning while the inside remains undercooked. I once tried a high‑heat method and ended up with a burnt exterior and a raw center—lesson learned the hard way. The key is patience; a slightly lower heat ensures a more even cook and a more tender result.
Why Your Nose Knows Best
Your nose is your best ally in the kitchen. When the garlic starts to turn golden and the butter begins to brown, that’s the exact moment to add the herbs. The aroma will tell you the herbs are at their peak. If you wait too long, they’ll lose their bright, fresh flavor and become bitter. I used to wait until the sauce was thick, but the dish ended up with a muted herb profile. Now I trust my nose and add the herbs right at the simmer, ensuring a vibrant, aromatic sauce.
The 5‑Minute Rest That Changes Everything
Resting the chicken after cooking is often overlooked, yet it’s crucial for juiciness. A 5‑minute rest allows the juices to redistribute, preventing them from spilling out when you cut into the meat. I’ve seen people cut straight away and get dry, uneven bites. After a short rest, every slice is moist and flavorful. If you’re in a rush, you can cover the chicken loosely with foil to keep it warm while it rests.
The Butter‑to‑Olive Oil Ratio
Balancing butter and olive oil is essential for a silky sauce that doesn’t feel heavy. The olive oil provides a fruity base, while the butter adds richness. Too much butter can cause the sauce to separate; too little will leave it flat. The 2:6 ratio (2 tbsp oil to 6 tbsp butter) works perfectly for this recipe, giving you a smooth, glossy finish without overwhelming the chicken.
The Quick Lemon Boost
Adding a splash of lemon juice at the end brightens the entire dish and balances the richness. If you’re craving a tangier bite, increase the lemon juice to 2 tbsp. The acidity cuts through the butter and adds a fresh, citrusy finish that lingers on the palate. I’ve found that a well‑timed squeeze of lemon transforms the sauce from buttery to vibrant, making each bite feel alive.
Creative Twists and Variations
This recipe is a playground. Here are some of my favorite ways to switch things up:
Spicy Cajun Kick
Add a tablespoon of Cajun seasoning to the chicken before searing. The peppery spice pairs beautifully with the garlic and herbs, giving the dish a smoky, bold flavor. This variation is perfect for those who like a little heat without overpowering the chicken.
Creamy Mushroom Medley
Sauté sliced mushrooms with the garlic and butter before adding the broth. The earthy mushrooms deepen the sauce’s flavor profile, creating a rich, comforting dish. Serve over creamy polenta or mashed potatoes to soak up the savory sauce.
Mediterranean Twist
Replace the parsley with chopped kalamata olives and capers. The briny flavors bring a Mediterranean vibe, while the lemon juice still offers brightness. This version is great for a light, summery dinner.
Herb‑Crusted Chicken
Mix the fresh herbs with breadcrumbs and lightly coat the chicken before searing. The crust adds crunch and an extra layer of herb flavor. The result is a delightful contrast between the crispy exterior and the tender interior.
Asian Fusion
Swap the lemon juice for rice vinegar and add a splash of soy sauce to the sauce. Incorporate a teaspoon of grated ginger and a pinch of chili flakes for a zesty kick. Serve over jasmine rice or with a side of steamed bok choy.
Breakfast Brunch
Serve the chicken over a bed of scrambled eggs and toast. Drizzle the buttery sauce over the eggs for a savory, protein‑packed brunch. This variation is a crowd‑pleaser for lazy weekend mornings.
Storing and Bringing It Back to Life
Fridge Storage
Store the cooked chicken in an airtight container in the refrigerator for up to 3 days. Keep the sauce separate if you want to avoid soggy chicken. When ready to serve, reheat the chicken in a skillet with a splash of broth to keep it moist. The sauce can be reheated gently on low heat, adding a few drops of water if it thickens too much.
Freezer Friendly
Freeze the chicken breasts individually on a parchment‑lined tray, then transfer them to a freezer bag. This prevents clumping and makes portioning easier. The dish keeps well for up to 2 months. Thaw overnight in the refrigerator before reheating as described above.
Best Reheating Method
Reheat the chicken in a skillet over low heat, adding a splash of water or broth to create steam. This technique restores moisture and prevents the sauce from drying out. If you’re in a hurry, microwave on medium power for 1–2 minutes, then finish in a skillet to crisp the edges.