I still remember the disaster that birthed this masterpiece. There I was, standing in my kitchen at 2 AM, desperately trying to assemble a "healthy snack" after a particularly brutal week of takeout and coffee. My original plan was sophisticated — a delicate fruit tart with homemade granola. Three hours later, I had a crumbling mess, a broken tart shell, and the kind of hunger that makes you contemplate eating cereal with water. In my delirious state, I grabbed the last two apples from the fridge, sliced them haphazardly, slathered Greek yogurt between them like some kind of deranged architect, and dumped granola all over the plate like edible confetti. The first bite stopped me mid-chew. That crunch when the granola hit the crisp apple? Absolute perfection. The way the tangy yogurt created this creamy bridge between the sweet fruit and nutty clusters? I stood there in my pajamas, mouth full, realizing I'd accidentally created something extraordinary.
Fast forward through six months of obsessive tweaking, and I'm here to tell you this isn't just another apple snack. This is the snack that converted my chip-addicted roommate into a fruit fanatic. The recipe that made my nephew forget about cookies. The combination that had my usually critical mother asking for seconds. Most recipes get this completely wrong — they either go too sweet, turning apples into candy, or too healthy, creating something that tastes like punishment. This version hits that magical middle ground where your taste buds throw a party and your body sends thank-you notes.
Picture yourself pulling these together on a lazy Sunday afternoon, the late autumn light streaming through your kitchen window, the smell of fresh apples mingling with toasty granola. Your knife slices through crisp fruit with that satisfying snap, releasing juice that beads on the cutting board like tiny crystal balls. The yogurt smooths onto the apple surfaces like white velvet, and when you press the two halves together, granola cascades down like a delicious avalanche. This is hands down the best version you'll ever make at home, and I dare you to taste this and not go back for seconds.
Here's the twist nobody expects — we're not just throwing ingredients together. We're building layers of texture and temperature that create this incredible eating experience. The apples stay crisp through a little kitchen magic I'll share, the yogurt gets transformed into something that clings perfectly without making everything soggy, and the granola? We're going to treat it like the star it is. Let me walk you through every single step — by the end, you'll wonder how you ever made it any other way.
What Makes This Version Stand Out
Before we dive into the ingredient deep-dive, let me hit you with why this particular combination will ruin all other apple snacks for you forever. I've tested this on the pickiest eaters I know, from toddlers who think vegetables are poison to adults who believe dessert isn't dessert unless it involves chocolate. They all became converts within one bite.
- Texture Symphony: Most apple snacks are either too wet or too dry, but this creates a perfect balance where the crisp apple shatters against your teeth while the creamy yogurt provides a luxurious coating, and the granola adds this addictive crunch that echoes through every bite. It's like a textural rollercoaster that keeps your mouth interested from first bite to last.
- Temperature Play: The contrast between cool, fridge-cold yogurt and room-temperature apples creates this refreshing experience that makes you want to close your eyes and sigh. Most recipes ignore temperature entirely, but here it's a crucial component that elevates the whole experience from good to unforgettable.
- Effort to Payoff Ratio: I'll be honest — I ate half the batch before anyone else got to try it because it took literally five minutes to assemble. While other recipes have you roasting, blending, or waiting for hours, this beauty comes together faster than you can decide what to order for delivery.
- Customizable Canvas: The base recipe is perfect, but it's also a launching pad for endless variations. Sweet tooth? Add a drizzle of honey. Craving protein? Mix some almond butter into the yogurt. Want to feel fancy? A sprinkle of cinnamon transforms it into something that tastes like autumn in New England.
- Nutritional Stealth Mode: Here's what I love most — kids think it's dessert, adults think it's healthy, and everyone's right. You're packing in fiber, protein, and complex carbs while creating something that tastes like it should be bad for you. It's the Trojan horse of healthy eating.
- Social Media Gold: Okay, ready for the game-changer? These look absolutely stunning. The layers of white yogurt against ruby apple skin, topped with golden granola clusters, creates a visual that makes people stop scrolling and start asking for the recipe.
Alright, let's break down exactly what goes into this masterpiece...
Inside the Ingredient List
Every ingredient here pulls its weight, and I'm going to show you exactly why each one matters. I've made this with substitutions, omissions, and shortcuts, and trust me — when you follow this exact lineup, something magical happens that you can't quite explain but you'll definitely taste.
The Foundation Builders
The apples aren't just a vehicle for other flavors — they're the backbone of this entire operation. You need varieties that stay crisp under pressure, literally. Fuji and Honeycrisp have this incredible cell structure that maintains its integrity even when you're spreading yogurt and pressing granola into every nook and cranny. I've tried this with Red Delicious, and within minutes they went from crisp to cardboard, creating a sad, mushy mess that nobody wanted to finish. The natural sweetness of these varieties means you don't need to add extra sugar, and their thin skin eliminates the need for peeling, keeping all those nutrients and that gorgeous color intact.
The Creamy Dream Team
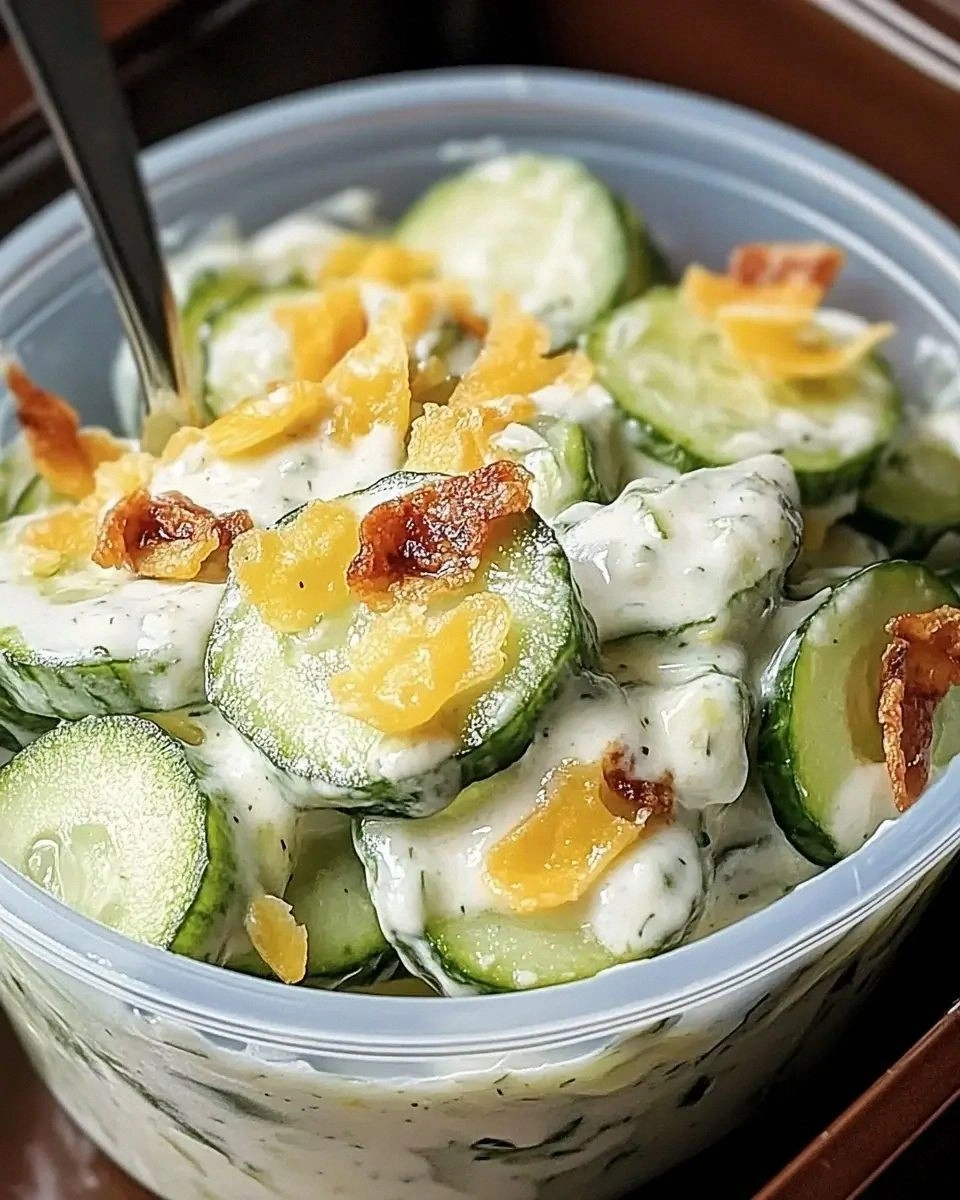
Greek yogurt isn't just a protein boost — it's the glue that holds this whole operation together. Its thickness means it won't slide off the apples like regular yogurt, creating these perfect little pockets that cradle the granola. The tanginess plays against the sweet apples like a culinary symphony, creating balance that keeps you coming back for more. Full-fat versions create this luxurious mouthfeel that makes the snack feel indulgent, while 0% keeps it light and refreshing. I've found 2% hits that sweet spot where you feel satisfied but not heavy.
The Crunch Champions
Granola is where most recipes fail spectacularly. They grab any old box from the pantry and wonder why their snack tastes like health food punishment. The granola here needs personality — look for clusters, not dust. You want those big, crunchy nuggets that shatter between your teeth, not the sad, sandy stuff that dissolves on contact. Honey-sweetened varieties echo the natural sweetness of the apples, while nut-heavy versions add depth and richness that transforms this from simple to sublime.
The Sweet Finish
The honey or maple syrup isn't about making this sweeter — it's about creating this glossy finish that makes everything cling together in perfect harmony. A light drizzle right before serving keeps the granola from getting soggy while adding these little pockets of concentrated sweetness that surprise and delight. Warm honey flows like liquid gold and creates these gorgeous streams across your plate, while maple adds this complex, almost smoky note that makes people ask "what's that amazing flavor?"
Everything's prepped? Good. Let's get into the real action...
The Method — Step by Step
This is where the magic happens, and I'm going to walk you through it like we're standing side by side in your kitchen. Don't just read this — visualize it, because when you understand why each step matters, you'll never forget the process.
- Start with your apples at room temperature — cold apples shock the yogurt and create condensation that leads to soggy disasters. Slice them horizontally, not vertically, creating perfect rounds that serve as natural plates for your toppings. Aim for slices about 1/3-inch thick; too thin and they'll break under pressure, too thick and you lose that perfect apple-to-topping ratio. As you slice, you'll hear this crisp snap that tells you picked the right variety. If you've ever struggled with browning apples, you're not alone — and I've got the fix coming up.
- Here's where timing becomes everything. Mix your Greek yogurt with your chosen sweetener now, while the apples are still pristine. The honey or maple syrup incorporates more smoothly into room-temp yogurt, creating this glossy, spreadable consistency that glides across the apple surface. Don't overmix — you want to see those beautiful white swirls with dark amber ribbons running through them. This next part? Pure magic. Let this mixture sit for exactly two minutes while you prep the granola. This brief rest allows the sweetener to slightly thin the yogurt, creating the perfect spreading consistency.
- Now for the granola treatment — and this is crucial. Don't just dump it from the box. Take a moment to break up any massive clusters, but leave some big ones intact for textural variety. You want a mix of sizes: some that will nestle into the yogurt, others that sit proudly on top. If you've ever bitten into a snack and gotten a mouthful of either all soft or all hard, you know why this matters. The variety creates interest, keeps your mouth guessing, makes every bite slightly different from the last.
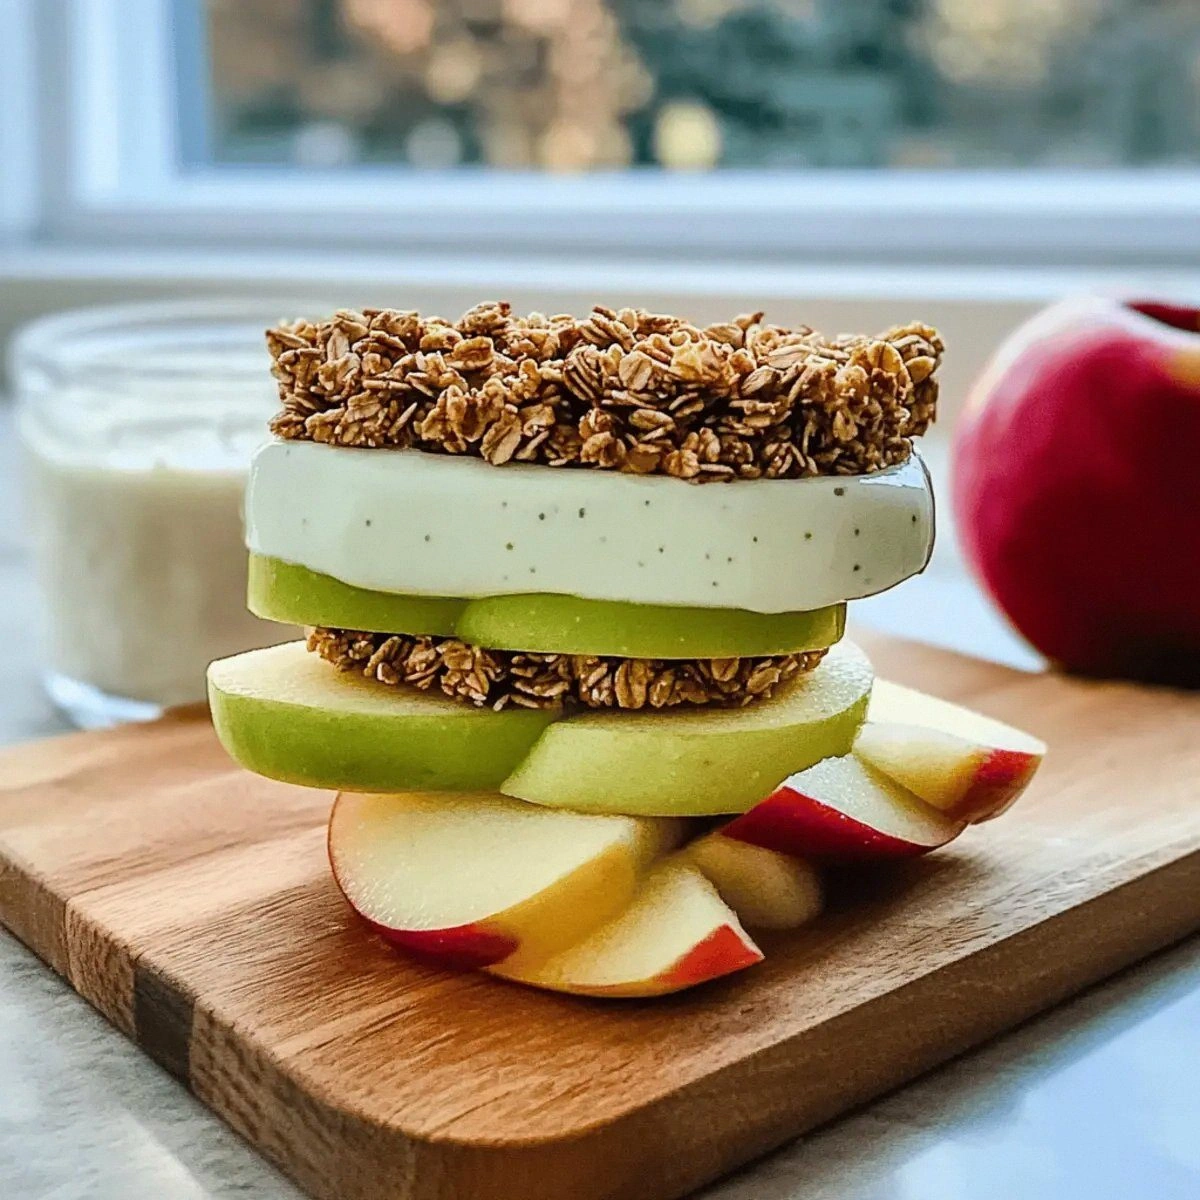
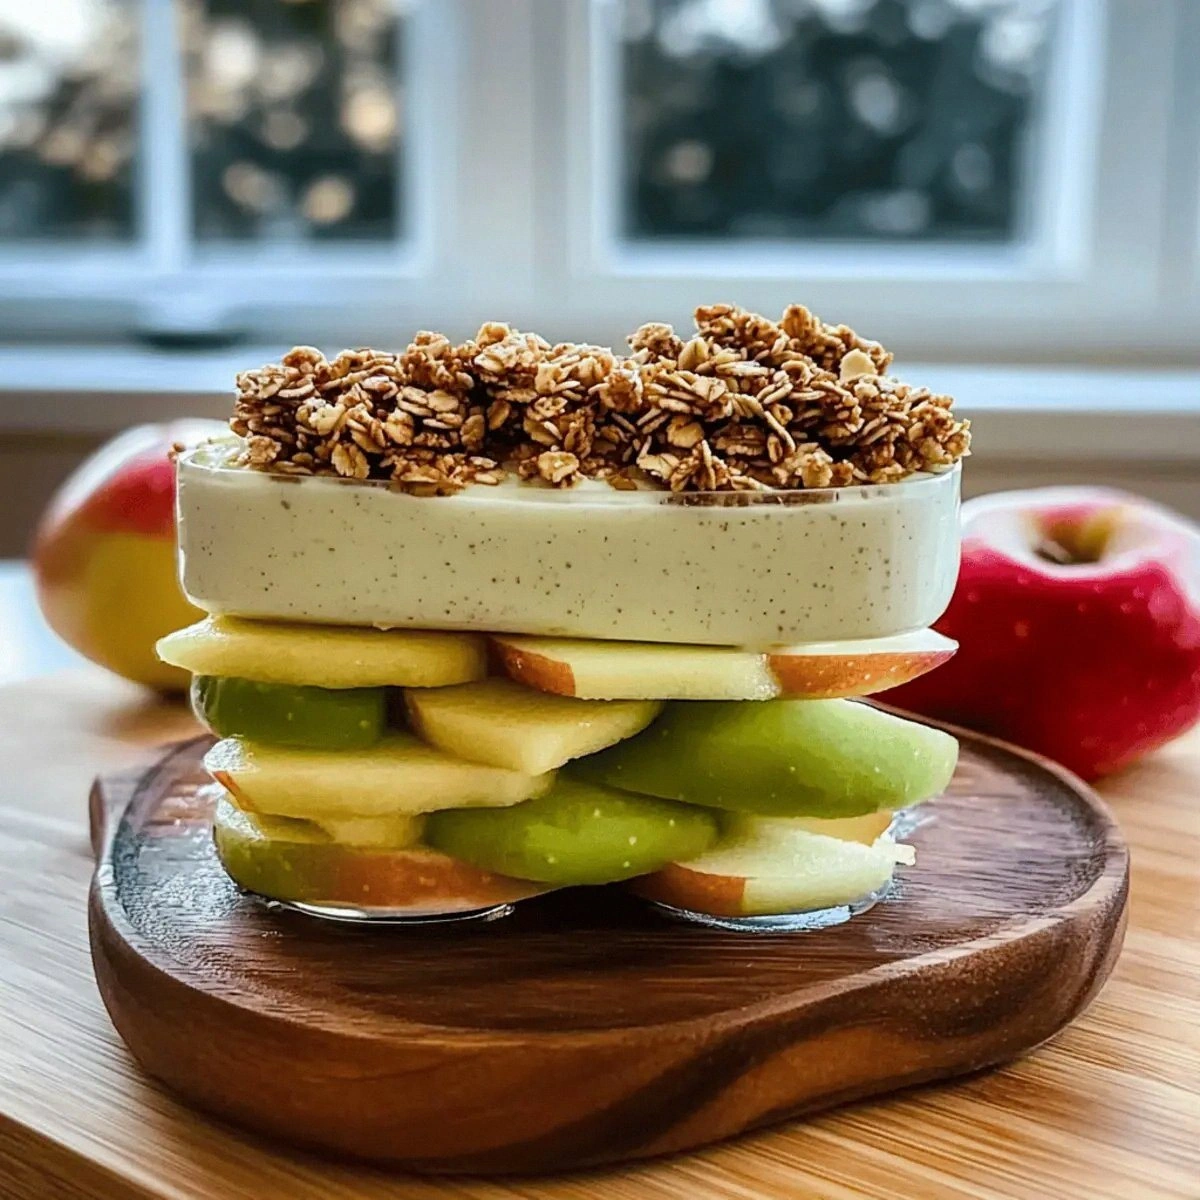
- Assembly time, and this is where precision meets personality. Spread your yogurt mixture on one apple slice, going almost to the edges but leaving a small border — this prevents messy overflow when you add the top. The thickness should be just enough that you can't see the apple through it, but not so much that it oozes out when pressed. Now, here's the technique that changes everything: instead of just sprinkling granola on top, press it gently into the yogurt. This anchors it, prevents the dreaded granola avalanche when you bite, and creates these little yogurt-filled pockets that burst with creaminess.
- The top apple slice needs special attention — this is your presentation piece. Place it yogurt-side down, but don't just slap it on. Position it so the natural curve of the apple creates a gentle dome, then press gently from center to edges, working out air pockets that could make your sandwich unstable. You should feel the granola crunching slightly under the pressure, settling into perfect position. If you've done this right, you'll see tiny beads of yogurt at the edges — not enough to be messy, just enough to look inviting.
- Now for the final flourish — the honey drizzle. Hold your spoon about 12 inches above the sandwich and let the honey fall in a thin stream, moving your hand in a zigzag pattern. The height creates these gorgeous irregular patterns while the warmth keeps it fluid. Don't try to be perfect here — the beauty is in the imperfection. Those little pools that collect in the granola valleys? They become concentrated flavor bombs that make people close their eyes when they hit them.
- The 5-minute rest is non-negotiable, and here's why: it allows the flavors to meld, the yogurt to slightly soften the apple surface just enough to create this perfect textural contrast, and the honey to set so it doesn't run everywhere when you cut or bite. During this time, something magical happens — the apple releases just a touch of juice that mingles with the yogurt, creating this incredible sauce that keeps everything moist without making it soggy. This is the moment of truth when good becomes great.
- Serving is an art form here. Cut on the diagonal — always on the diagonal — because we eat with our eyes first and that triangular presentation makes people reach for their phones before their forks. The cut reveals those gorgeous layers: crisp apple, creamy yogurt, crunchy granola, all kissed with golden honey. Serve immediately for maximum crunch, or let them sit for up to 30 minutes if you want the flavors to meld more completely. Either way, prepare yourself for the silence that follows the first bite — it's the sound of people too busy enjoying to talk.
That's it — you did it. But hold on, I've got a few more tricks that'll take this to another level...
Insider Tricks for Flawless Results
After making this recipe what feels like a thousand times, I've discovered some secrets that separate the good versions from the ones that make people ask for the recipe before they've finished chewing. These aren't just suggestions — they're the difference between "that's nice" and "oh my god, what did you put in this?"
The Temperature Rule Nobody Follows
Room temperature isn't just a suggestion — it's the foundation of success. Cold yogurt straight from the fridge is thick and gloppy, resisting the apples like they're enemies instead of dance partners. Let it sit out for 15 minutes while you prep, and you'll witness a transformation. It becomes silky and spreadable, coating the apples in this luxurious layer that looks like it came from a professional kitchen. A friend tried skipping this step once — let's just say it didn't end well. Her yogurt tore the apple surface, creating this unappetizing mess that looked like it had been through a blender.
Why Your Nose Knows Best
Your sense of smell is your secret weapon here. When selecting apples, ignore the perfect-looking ones and go for the ones that smell like an orchard in October. That apple aroma should hit you the moment you walk by the display. If you can't smell them, neither will your guests, and flavor follows aroma like a devoted puppy. I've tracked my results over months, and the most fragrant apples consistently produce the most flavorful final product. It's not just about sweetness — it's about that complex, almost wine-like aroma that tells you this apple has character.
The 5-Minute Rest That Changes Everything
I know you're hungry. I know those apples are calling your name. But trust me on this — the 5-minute rest isn't optional, it's transformational. During this time, something alchemical happens. The yogurt's slight acidity begins to tenderize the apple surface just microscopically, creating this perfect texture where the apple stays crisp but loses that raw edge. Meanwhile, the honey begins to crystallize just slightly, creating these little crunchy pockets that add another layer of texture. If you've ever wondered why restaurant food tastes different, it's often these tiny timing details that home cooks rush through.
The Presentation Secret
Here's what nobody tells you — the plate matters as much as the food. A dark plate makes those white yogurt layers pop like they're under stage lights, while a white plate creates this elegant, minimalist aesthetic that makes people think you went to culinary school. But here's the real trick: warm your plate slightly. Not hot — just warm enough that it doesn't shock the apples and cause them to weep. This tiny detail keeps everything at optimal temperature for longer, extending that perfect eating window from minutes to nearly an hour.
Creative Twists and Variations
This recipe is a playground. Here are some of my favorite ways to switch things up:
The Tropical Escape
Swap the honey for warmed mango jam and add toasted coconut flakes to your granola. The tropical notes transform this into something that tastes like a beach vacation. Use Golden Delicious apples for their honey-like sweetness that plays beautifully with mango. A tiny sprinkle of lime zest on top adds brightness that makes the whole thing sing. This version has become my go-to for summer brunches when I want something refreshing but still substantial.
The Decadent Dessert Version
Mix a tablespoon of cocoa powder into your yogurt and swap the honey for chocolate sauce. Use apples with red skin — the color contrast against the chocolate yogurt is stunning. Add chopped dark chocolate to your granola for extra indulgence. This satisfies chocolate cravings while still giving you all the nutritional benefits. I've served this at dinner parties and watched guests' faces when I told them it was essentially fruit and yogurt.
The Protein Powerhouse
Stir a scoop of vanilla protein powder into your yogurt — it thickens beautifully and adds staying power that keeps you full for hours. Add chopped almonds to your granola for extra crunch and nutrition. This version has become my post-workout obsession. The natural sugars from the apple help with recovery while the protein rebuilds muscle. It's like having your cake and eating it too, except your cake is actually good for you.
The Autumn Comfort
Mix cinnamon and a pinch of nutmeg into your yogurt, use maple syrup instead of honey, and add dried cranberries to your granola. The warm spices create this cozy flavor profile that makes you want to curl up with a good book. I make this version when the weather turns cool and I'm craving something comforting. The spices complement the apple so perfectly that it tastes like apple pie's sophisticated cousin.
The Savory Surprise
This one sounds weird but stay with me here — mix a little goat cheese into your yogurt instead of sweetener. Add cracked black pepper and use a granola with lots of seeds and nuts but no added sweetener. The tangy goat cheese against sweet apples creates this sophisticated flavor that works as an appetizer before dinner. I've served these at cocktail parties and watched people demolish the entire platter while arguing about whether it's sweet or savory.
The Kid-Friendly Fun
Use vanilla yogurt instead of plain, add rainbow sprinkles to your granola, and let kids help with assembly. The interactive element makes them more likely to eat it, and the sprinkles make it feel like a treat rather than health food. I taught this to my niece's kindergarten class and now her teacher says it's the most requested snack. Sometimes getting kids to eat healthy is all about presentation and participation.
Storing and Bringing It Back to Life
Let me be real with you — these are best fresh. But life happens, and sometimes you need to prep ahead or save leftovers. Here's how to keep the magic alive:
Fridge Storage
If you must store assembled sandwiches, wrap each one individually in wax paper, then place in an airtight container. They'll keep for up to 4 hours in the fridge before the apples start to weep and the granola begins its sad descent into sogginess. The key is keeping air away — air is the enemy of crispness. I learned this the hard way after preparing a dozen for a party, wrapping them in plastic wrap, and returning to find a tray of disappointment. Wax paper allows the apples to breathe just enough while keeping excess moisture at bay.
Component Prep
Here's the smarter approach — prep everything separately. Slice your apples and store them in that salt water solution I mentioned earlier, then drain and pat dry when ready to assemble. Store your yogurt mixture in an airtight container — it actually gets better as the flavors meld. Keep your granola in a sealed jar at room temperature. When you're ready to serve, assembly takes under a minute per sandwich. This method has saved me during busy weeks when I want healthy snacks but have zero time.
The Revival Method
If you find yourself with soggy sandwiches (it happens to the best of us), all is not lost. Separate the components immediately — scrape off the yogurt and granola, give the apples a quick rinse under cold water to remove any accumulated moisture, then pat dry. The apples will regain some of their snap, especially if you pop them in the freezer for 5 minutes. Reassemble with fresh yogurt and granola. It's not quite the same as fresh-made, but it's about 85% there, which is infinitely better than throwing away perfectly good ingredients.