I was standing in my kitchen, half‑asleep, staring at a half‑sliced cucumber that had somehow ended up on the floor while I was juggling a pot of boiling pasta. The whole scene smelled like burnt garlic and triumph, and I thought, “If only there was a snack that could rescue me from this chaos and still make me feel like a culinary wizard.” That night, after a disastrous attempt at fried zucchini chips that turned into soggy green mush, I vowed to create the ultimate crisp‑on‑the‑outside, juicy‑inside bite that would make even the most skeptical snack‑hater swoon. I dared myself to combine the crunch of a perfectly baked cucumber slice with a dip so creamy it could double as a facial mask for the skin‑obsessed among us.
Picture this: a thin slice of cucumber, its skin glistening with a whisper of olive oil, tossed into a hot pan until the edges turn golden and crackle like thin ice under a spring sun. The aroma that rises is a heady mix of toasted paprika and a faint herbaceous note that makes you want to inhale deeply, almost as if the kitchen itself is exhaling satisfaction. When you dip that bite into the tangy, herb‑laden yogurt sauce, the coolness of the cucumber meets the silkiness of the dip, creating a contrast that feels like a summer breeze colliding with a cloud of vanilla ice cream. The first bite is a symphony—crunch, cream, zest—all playing together in perfect harmony.
Most recipes for cucumber appetizers either drown the vegetable in heavy batter or serve it raw, leaving you with a soggy mess or a bland snack that does nothing for your taste buds. I’ve tried the “fancy” versions that call for a thousand steps, and let me be honest — I ate half the batch before anyone else got a chance to try it. This version, however, is hands down the best you’ll ever make at home: it uses just a handful of pantry staples, requires no deep‑frying, and delivers a crunch that rivals store‑bought chips while keeping the fresh, garden‑like flavor of cucumber intact.
The secret weapon? A light dusting of paprika and a splash of olive oil that create a crisp skin without the need for a breading tunnel, plus a dip that balances tangy Greek yogurt with fresh dill and lemon juice for a zing that cuts through the richness. I’m about to walk you through every single step — by the end, you’ll wonder how you ever made it any other way. Okay, ready for the game‑changer?
What Makes This Version Stand Out
- Crunch Factor: The thin cucumber slices fry up like wafer‑thin chips, delivering a snap that shatters like thin ice under a spoon. No soggy middle, just pure, airy crunch that holds its shape even after a few minutes on the plate.
- Freshness Amplified: By pairing the hot, crispy bites with a chilled, herb‑infused yogurt dip, you get a temperature contrast that makes each mouthful feel like a mini‑spa treatment for your palate.
- Simplicity: Only eight ingredients, no batter, no deep fryer, and a total prep time under 20 minutes. If you’ve ever struggled with complicated snack recipes, you’re not alone — and I’ve got the fix.
- Ingredient Quality: Using a large, firm cucumber and full‑fat Greek yogurt ensures the bite stays robust and the dip stays velvety. Cheap produce will make the texture limp and the dip watery.
- Crowd Reaction: I dare you to taste this and not go back for seconds. Even the most skeptical kids will ask for the recipe, and you’ll earn instant bragging rights at any gathering.
- Make‑Ahead Magic: The dip can be prepared a day ahead, allowing the flavors to meld while the cucumber bites stay crisp when you’re ready to serve.
- Low‑Fat Elegance: Compared to traditional fried snacks, this method uses just a tablespoon of olive oil, keeping the calorie count reasonable without sacrificing flavor.
- Seasonal Flexibility: Whether it’s a scorching summer BBQ or a cozy winter movie night, the bright, refreshing profile works year‑round.
Inside the Ingredient List
The Flavor Base
Greek yogurt is the heart of the dip. Its natural tang cuts through the richness of the olive oil and provides a creamy canvas for the fresh dill and lemon juice. If you skip the yogurt, you’ll end up with a watery sauce that can’t cling to the cucumber. For a dairy‑free twist, try a thick coconut‑based yogurt, but expect a subtle coconut aftertaste that may clash with the dill.
The Texture Crew
A large cucumber is essential. Look for one that’s firm, with a deep green skin and no soft spots. The firmness ensures the slices hold together during frying; a wilted cucumber will collapse into a mushy mess. If you can’t find a large cucumber, two medium ones work just as well, but you’ll need to slice them a touch thinner to achieve the same crunch.
The Unexpected Star
Paprika isn’t just for color; it adds a smoky depth that elevates the simple olive oil coating into something restaurant‑worthy. A pinch too much can overwhelm the delicate cucumber, so measure carefully. If you love heat, swap half the sweet paprika for smoked chipotle powder for a subtle kick that will make your guests gasp.
The Final Flourish
Fresh dill and lemon juice bring brightness and herbaceous perfume to the dip. Fresh dill should be finely chopped; dried dill loses its aromatic punch and can taste bitter. When selecting lemons, go for ones that feel heavy for their size—those are the juiciest. If you’re out of fresh dill, a teaspoon of dried dill plus a dash of parsley can work in a pinch, though the flavor will be less vibrant.
Everything's prepped? Good. Let's get into the real action...
The Method — Step by Step
Slice the cucumber lengthwise into thin, uniform rounds about ¼ inch thick. The thinner the slice, the crisper the final bite. Place the slices on a large plate and sprinkle a pinch of salt; this draws out excess moisture, preventing steam from ruining your crunch. Let them sit for five minutes, then pat them completely dry with paper towels. That sizzle when it hits the pan? Absolute perfection.
Kitchen Hack: Use a mandoline for ultra‑even slices; it guarantees that every bite cooks at the same rate.In a shallow bowl, whisk together the olive oil, paprika, and a pinch of black pepper. The oil should coat the cucumber slices lightly—think of a glossy veil, not a pool. Toss the cucumber rounds in this mixture until each slice gleams with a thin sheen. This coating is the secret to that golden‑brown crust without drowning the veggies in oil.
Heat a large non‑stick skillet over medium‑high heat. When the pan is hot enough that a drop of water dances and evaporates instantly, it’s ready. Add the cucumber slices in a single layer, making sure they don’t overlap; crowding the pan creates steam and sabotages the crisp.
Watch Out: If the oil starts smoking, lower the heat immediately; burnt oil will give the bites a bitter aftertaste.Cook the slices for 2‑3 minutes on the first side. You’ll know they’re ready when the edges start pulling away from the pan and a faint caramel aroma fills the kitchen. Flip them carefully with a spatula; they should be golden‑brown and slightly crisp on both sides. This is the moment of truth—if you’ve timed it right, the texture will be a perfect balance of crunch and tenderness.
While the cucumber bites finish, prepare the dip. In a medium bowl, combine the Greek yogurt, fresh dill, lemon juice, garlic powder, and a generous pinch of salt and pepper. Stir until smooth; the dip should be thick enough to hold its shape when spooned, but still pourable. Taste and adjust the lemon or dill if you crave more brightness.
Once the cucumber slices are crisp, transfer them to a paper‑towel‑lined plate to absorb any stray oil. Let them rest for a minute; this brief pause allows the crust to firm up even more, giving you that satisfying snap when you bite.
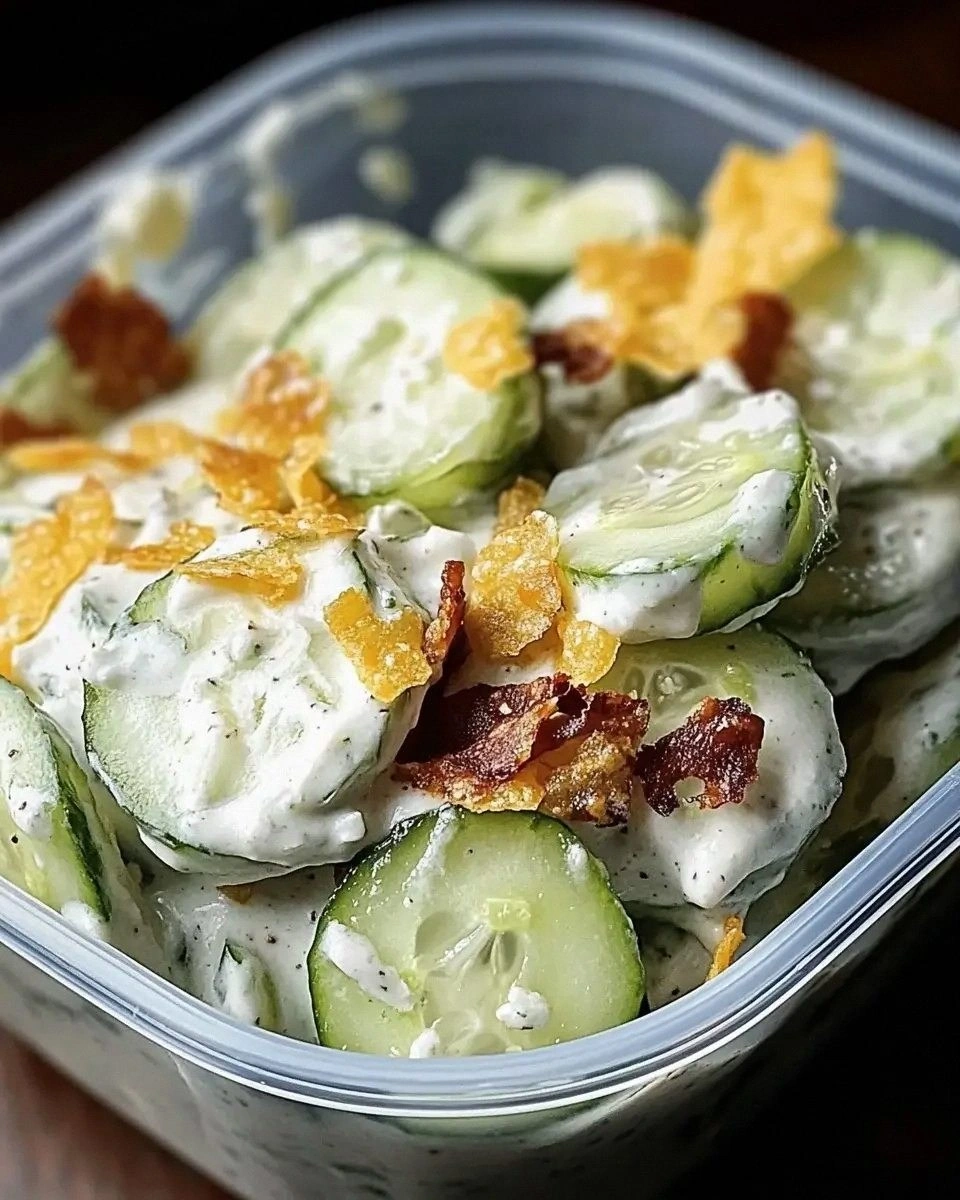
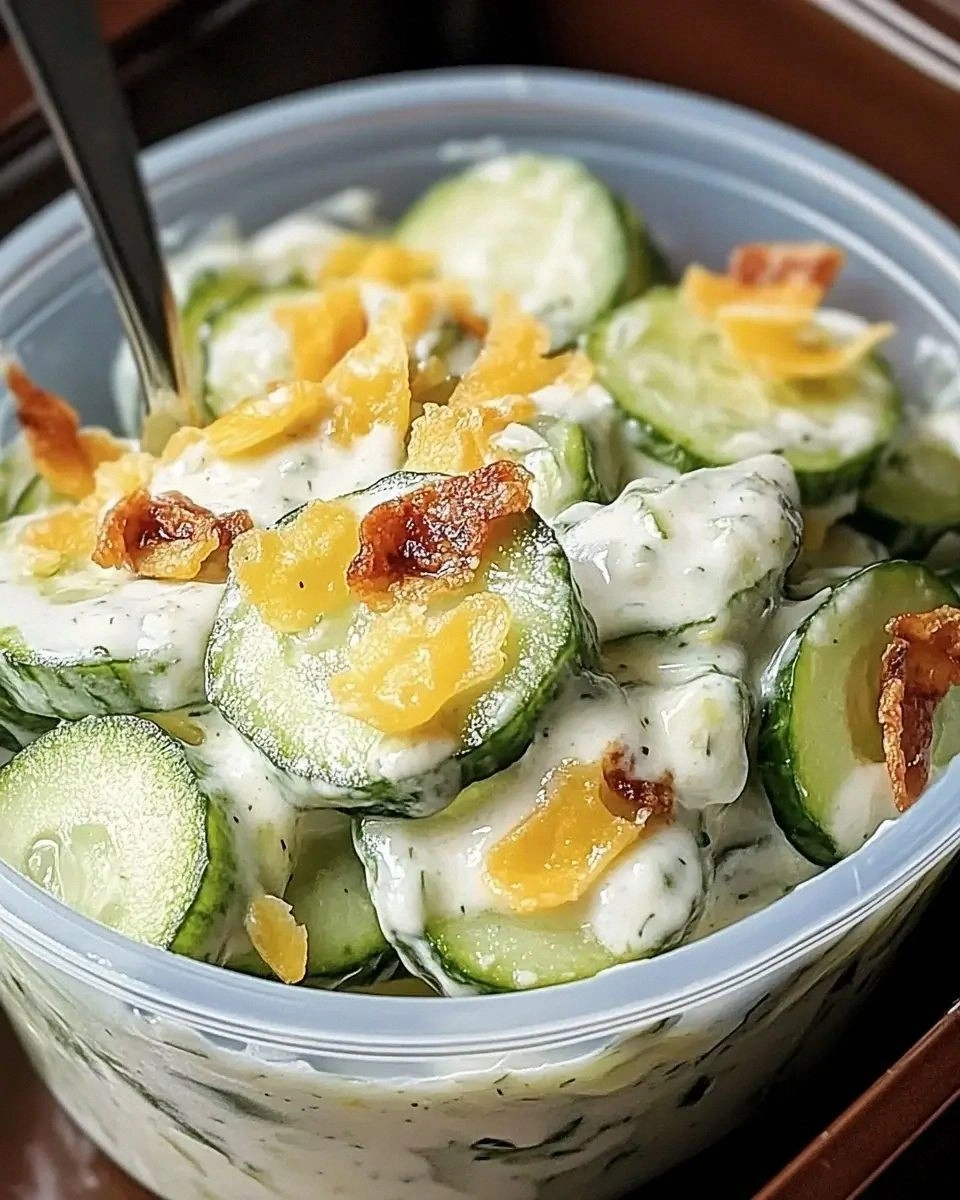
Arrange the crispy cucumber rounds on a serving platter, overlapping them slightly for visual appeal. Spoon a dollop of the creamy dip onto each slice, or serve the dip in a separate bowl for communal dipping. The contrast of hot, crunchy cucumber against cool, tangy yogurt creates a flavor explosion that will have guests reaching for more.
Kitchen Hack: Sprinkle a tiny pinch of flaky sea salt on the dip just before serving for an extra pop of flavor.Finish with a final flourish: a drizzle of extra‑virgin olive oil over the assembled bites and a sprinkling of fresh dill leaves for color. Step back, admire the glossy, speckled surface, and take a moment to inhale the aromatic blend of paprika, lemon, and dill. Picture yourself pulling this out of the oven, the whole kitchen smelling incredible… and then dive in.
That's it — you did it. But hold on, I've got a few more tricks that'll take this to another level...
Insider Tricks for Flawless Results
The Temperature Rule Nobody Follows
Never fry cucumber slices over high heat from the get‑go. Start at medium‑high, then drop to medium once the first side browns. This prevents the outside from scorching while the inside remains raw. A friend once cranked the heat to “max” and ended up with blackened, bitter chips that no one could finish.
Why Your Nose Knows Best
When the paprika‑infused oil begins to release a sweet, smoky scent, that’s your cue to flip the slices. The nose is a more reliable timer than a stopwatch because the aromatic compounds volatilize exactly when the Maillard reaction reaches its peak. Trust that nose, and you’ll never overcook.
The 5‑Minute Rest That Changes Everything
After frying, let the cucumber bites rest on a cooling rack for five minutes. This short pause lets the interior steam gently, preventing the crust from collapsing when you bite into it. It’s a tiny step that makes the texture feel like a professional fry‑cook’s secret.
Seasoning the Dip at the Right Time
Add the lemon juice to the yogurt dip right before serving, not hours ahead. The acid can cause the yogurt to thin out over time, so a fresh splash ensures a thick, luscious consistency that clings to each bite.
The Olive Oil Distribution Trick
Instead of drizzling oil directly onto the pan, whisk it with the paprika and pepper first. This creates an even coating that adheres to every cucumber slice, guaranteeing uniform browning. A quick drizzle after the fact would leave patches of oil and uneven crunch.
Creative Twists and Variations
This recipe is a playground. Here are some of my favorite ways to switch things up:
Spicy Sriracha Swirl
Add a teaspoon of sriracha to the yogurt dip and a pinch of cayenne to the oil mixture. The heat will dance with the cool cucumber, perfect for those who like a little fire in their snack.
Mediterranean Medley
Fold in chopped sun‑dried tomatoes and Kalamata olives into the dip, and sprinkle crumbled feta over the finished bites. The salty, tangy notes bring a Greek island vibe to your appetizer table.
Herb Garden Explosion
Swap dill for a blend of fresh mint, basil, and parsley. The herbaceous burst adds a fresh springtime feel, making the dip taste like a garden in a bowl.
Cheesy Crunch
Mix a tablespoon of grated Parmesan into the oil‑paprika coating. The cheese melts slightly during frying, creating a nutty crust that pairs beautifully with the lemon‑yogurt dip.
Vegan Victory
Replace Greek yogurt with a thick coconut yogurt, use olive oil spray instead of oil, and add a dash of smoked paprika for depth. The result is a plant‑based version that still delivers on crunch and creaminess.
Storing and Bringing It Back to Life
Fridge Storage
Store the dip in an airtight container for up to three days. The cucumber bites are best kept separate; place them in a paper‑towel‑lined container to retain crispness. If you must store them together, add a sheet of parchment paper between layers to prevent sogginess.
Freezer Friendly
The cooked cucumber slices freeze well for up to two months. Lay them on a baking sheet in a single layer, freeze solid, then transfer to a zip‑top bag. Thaw in the fridge and re‑crisp in a hot pan for a quick snack revival.
Best Reheating Method
Reheat the frozen or refrigerated bites in a preheated 375°F (190°C) oven for 5‑7 minutes, or until the edges regain their golden hue. Add a tiny splash of water to the pan before reheating if you’re using a skillet; the steam will bring the crisp back without drying out the cucumber.